
Jobs to Inbox is a participant in the Amazon Services LLC Associates Program. When you buy through links on this page we may earn a commission, at no extra cost to you. We choose every product ourselves and we are never paid to include one. How we pick.
Work From Home Essentials and Desk Gear
Monitor Arm Setup Guide: 6 Ways to Free Up Desk Space and Stop Neck Strain
A proper monitor arm setup can reclaim your desk and improve posture, making your remote workday more comfortable and productive.

The quick answer
- Choose a single or dual monitor arm based on your screen setup.
- Mount it securely using a clamp or grommet and adjust height and distance.
- Turn one screen vertical for reading documents to maximize space.
That creeping feeling of being overwhelmed by your own desk is a common frustration in the world of remote work. Your screen, propped up on a wobbly stack of books, sits stubbornly in the middle of everything, stealing precious real estate. Cables snake everywhere, creating a tangled mess that collects dust and makes it impossible to wipe the surface clean. By the afternoon, a familiar ache begins to form in your neck and shoulders from hunching over, a constant reminder that your setup is working against you. A well-chosen monitor arm is the direct solution to this daily struggle, designed to lift your screen off the desk entirely and give you complete control over its position.
This guide will walk you through six specific ways that using this simple piece of equipment can completely transform your workspace. We will cover how to free up that valuable desk space for good and, just as importantly, how to position your screen to stop the neck and back strain that plagues so many home offices. By following these practical steps, you can create a workspace that feels more open, organized, and ergonomically sound, allowing you to focus on your work without the physical discomfort and mental clutter.
Our tested picks for an 8-hour day
Best overall
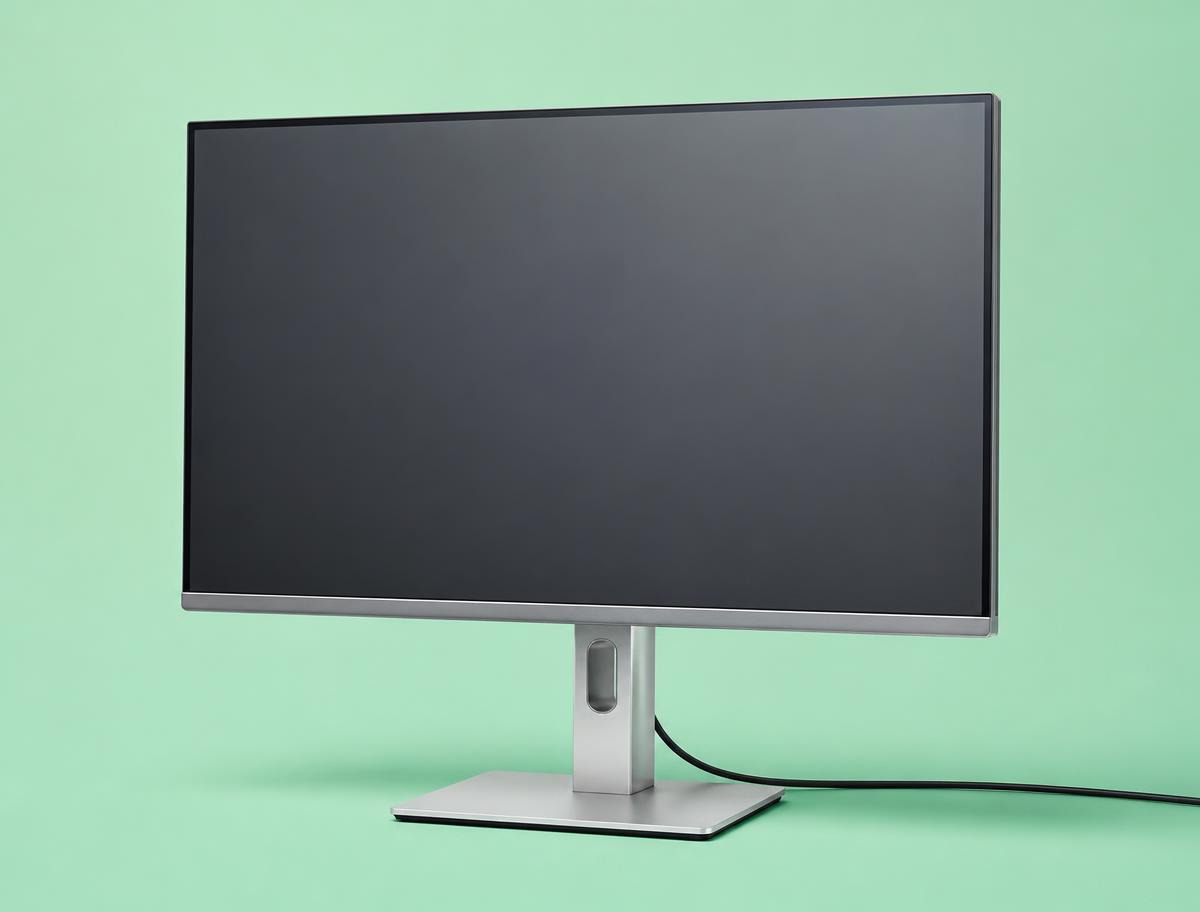
Dell S2722DC
One-screen setups where the laptop closes and lives on a stand.
A 27-inch 1440p panel with USB-C power delivery, which means a single cable to the laptop for video, data and charging. At this size 1440p is the sweet spot: two full documents side by side, text crisp at 100% scaling, and no display scaling to fight with on a work laptop. Height adjustment is built in, which quietly saves the cost of an arm.
The one I use — best overall
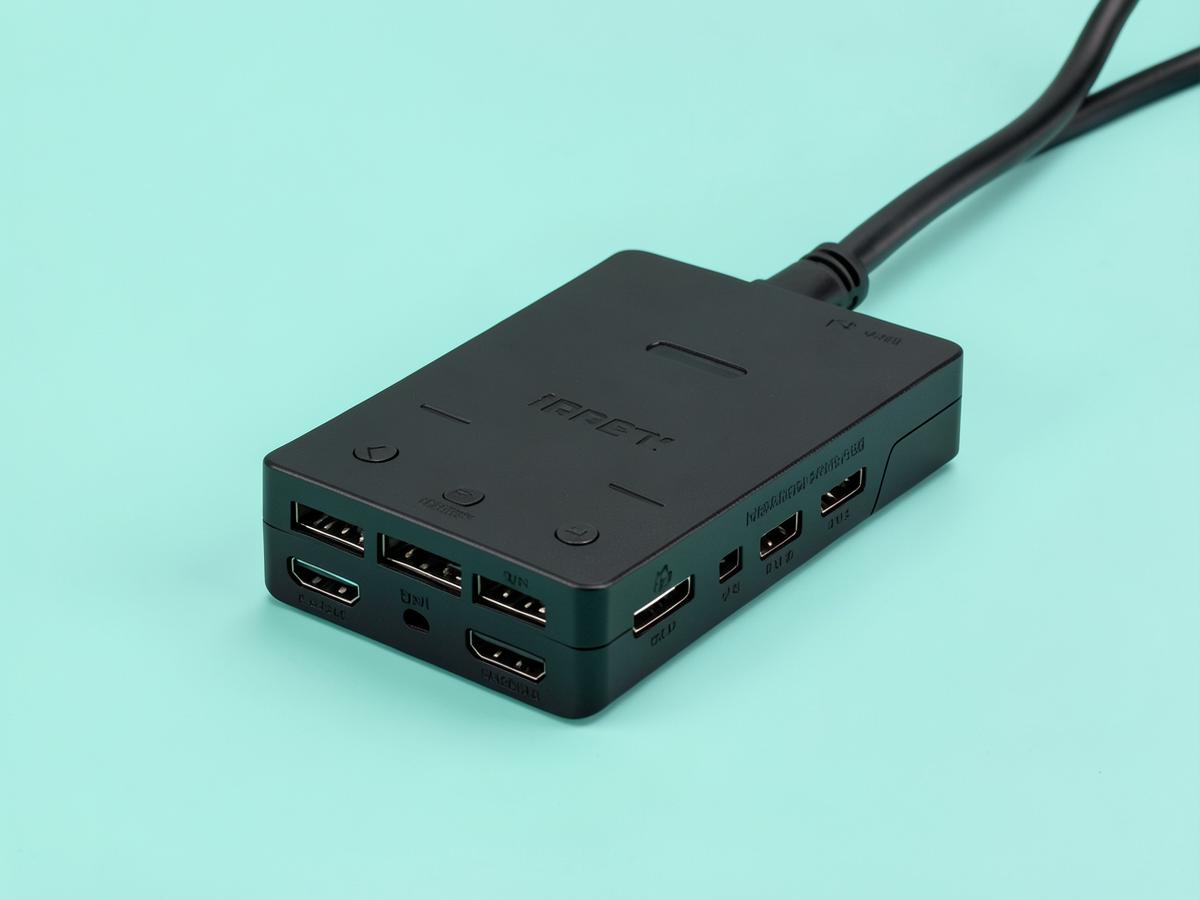
Anker Laptop Docking Station Dual Monitor 8-in-1
Two external screens, one cable, and a morning routine you stop noticing.
Months in, the thing I notice about this dock is that I do not notice it. One USB-C cable goes into the laptop and two monitors, a keyboard, a mouse, a headset and the charger all come alive at once. It handles two screens over the twin HDMI outputs, passes power through to the laptop so there is no separate charger to fumble for, and includes ethernet — which matters more than people expect, because a wired connection during a long call is noticeably steadier than a flat's wireless. It runs warm after a full day, which is normal for the class, and the fixed cable is short enough that the dock has to sit near the laptop rather than tucked away behind the desk. Neither is a real complaint. What matters is that it has never dropped a screen mid-call, which is the failure mode that makes cheap docks worthless. If you work from a laptop with two monitors in front of you, this is the purchase that removes a small irritation from every single working day, and it costs less than a decent office chair cushion arrangement.
Smallest real footprint
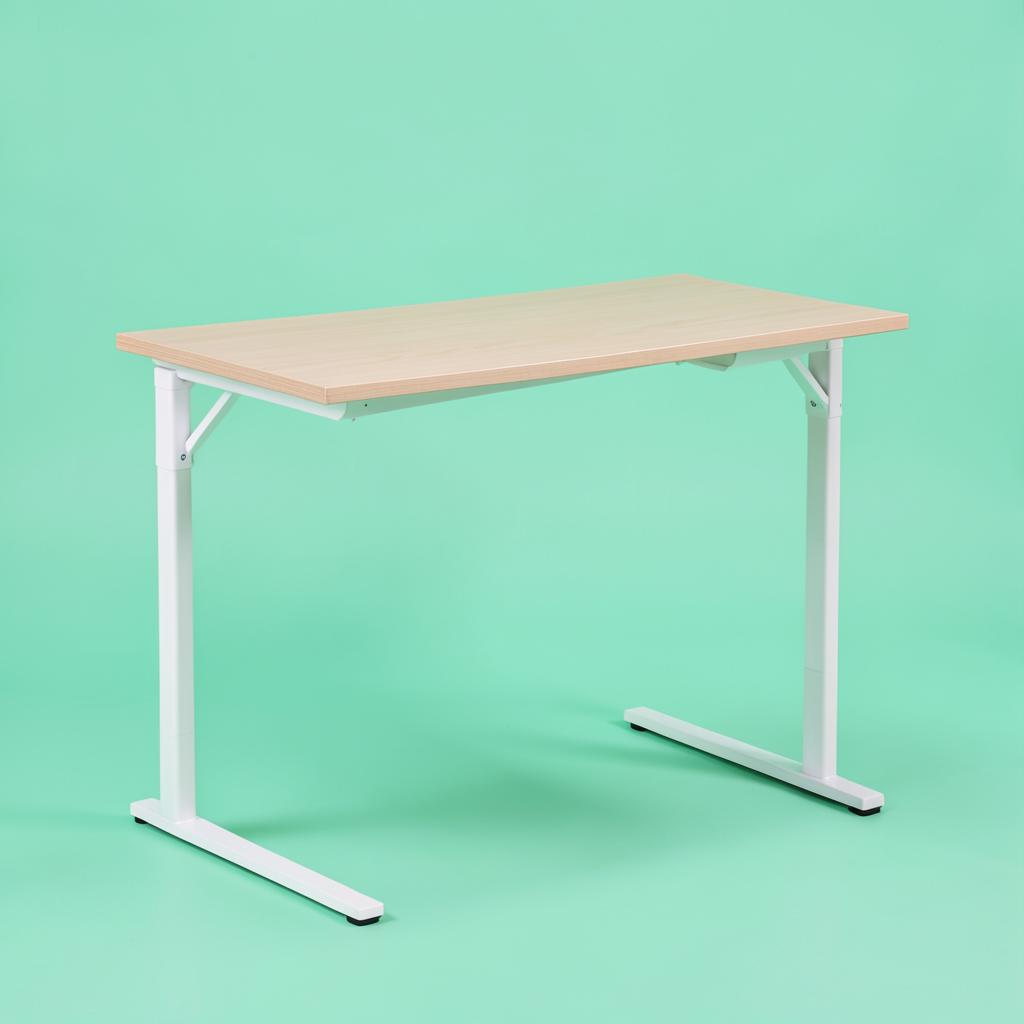
Prepac Floating Desk
Hallways and rooms where nothing can touch the floor.
Mounted into studs, this gives you a working surface with no legs to walk into and a clear floor underneath, which visually gives a small room back to you. There is a drop-down section that hides pens, cables and a notebook, so the wall looks tidy when you stop for the day. The trade-offs are real: you are drilling into a wall, the height is fixed at whatever you mount it at, and the weight limit suits a laptop, a light monitor and a lamp rather than two big screens.
Choosing Your Foundation: Single vs. Dual Monitor Arm Options
The first decision point in your journey toward a better workspace is determining the right type of arm for your specific needs. This choice is based almost entirely on how many screens you use for your daily tasks. Whether you have a single, primary display or a more complex dual-screen setup, there is a configuration designed to support your workflow. The goal is to replace the bulky, static stands that came with your screens with a flexible, space-saving system.
This decision is about more than just holding up a screen. It is about laying the groundwork for a more dynamic and comfortable work environment. A single arm provides simplicity and maximum flexibility for one screen, while a dual-arm setup brings order and alignment to a multi-monitor arrangement. Let’s explore the distinct advantages of each so you can choose the one that best suits your desk and your job.
1. Reclaim Space with a Single Monitor Arm
For the majority of remote professionals who rely on one primary screen, the single monitor arm is a revelation. Its function is simple yet profoundly effective. The device attaches to your desk and extends a single articulated arm to hold your display. The moment you lift your screen from its original stand and attach it to the arm, you will be struck by how much desk space you instantly get back. The entire area that was once occupied by the wide, clunky base is now open and usable. You can finally place your keyboard, notebook, or cup of coffee exactly where you want it, without a plastic stand dictating the layout of your desk.
The benefit extends beyond just static space. These arms are designed for movement. Depending on the type you choose, such as a gas spring model, you can reposition your screen with just a light touch. Push it back when you need to spread out papers for review. Pull it closer when you are focusing on detailed spreadsheet work. Swing it to the side to show a colleague something during a video call. This effortless adjustment is something a standard monitor stand can never offer. It transforms your screen from a fixed object into a dynamic tool that adapts to your tasks throughout the day.
This newfound freedom dramatically changes the feeling of your workspace. Instead of being a cramped and restrictive area, your desk becomes an open, airy surface. The visual clutter is reduced, which can have a surprisingly positive impact on your mental clarity and focus. The screen appears to float above the desk, creating a clean, modern aesthetic. For anyone struggling with a small desk or simply craving a more minimalist and organized environment, a single arm is the most direct path to achieving it. It is a simple change that delivers an outsized improvement in both the function and feeling of your home office.
2. Maximize Productivity with a Dual Monitor Arm
If your workflow involves two screens, you are already familiar with the productivity benefits. You are also likely familiar with the challenges. Two separate monitor stands consume an enormous amount of desk space, often forcing your keyboard into an awkward position. Worse yet, getting the two screens to align perfectly in height and angle is a frustrating exercise in tiny adjustments, often with mismatched results. A dual monitor arm solves all of these problems in one elegant package. It uses a single mounting point on your desk to support both of your screens, immediately clearing a vast territory of previously occupied desk surface.
There are generally two styles of dual-arm systems. One popular type features a single base with two independently articulating arms. This setup offers the ultimate flexibility, allowing you to position each screen exactly as you see fit. You can have one centered and one angled to the side, or you can bring them together to form a seamless panoramic view. You can even have one screen in a landscape orientation and the other in a portrait (vertical) orientation, a setup we will discuss in more detail later. This independent movement is ideal for users who have very specific or frequently changing positioning needs.
The other common style uses a crossbar that extends from a central pole. The two monitor mounts slide along this bar. The advantage of this design is that it guarantees your two screens will always be at the exact same height, creating a perfectly level and cohesive digital workspace. While it may offer slightly less independent depth adjustment than a dual-articulating-arm model, it excels at providing a clean, symmetrical, and perfectly aligned setup. For users who primarily want their two screens side-by-side in a traditional configuration, a crossbar system is an excellent and stable choice. Regardless of the style, a dual-arm system declutters your desk, streamlines your setup, and turns two separate, clunky screens into a single, integrated workstation.
Securing Your Setup: Mounting Your Monitor Arm Correctly
Once you have decided between a single or dual arm, the next critical step is to securely attach it to your desk. An improperly mounted arm is unstable and unsafe, completely undermining the benefits it is meant to provide. The stability of the entire system rests on this connection point. A strong, solid mount ensures your expensive screens are safe and allows for smooth, confident adjustments without any wobble or drift.
Fortunately, these products are designed with this in mind and offer robust, user-friendly mounting solutions. The two primary methods are the clamp mount and the grommet mount. Your choice between them will depend entirely on the design and construction of your desk. Before you purchase anything, you must inspect your desk to see which option will work best. Taking a few moments to do this will save you a significant amount of time and potential frustration later on.
3. Select the Right Mount: Clamp vs. Grommet
The most common and versatile mounting option is the desk clamp. This mechanism functions like a large C-clamp. It slides over the back or side edge of your desk, and you tighten a screw or lever from underneath, pressing a pressure plate firmly against the underside of the desk surface. This creates a secure, non-permanent grip that is surprisingly strong. The main requirement for a clamp mount is that your desk must have a clear, flat edge with a bit of an overhang or lip for the clamp to grab onto. Desks with a thick trim piece or a beveled edge may not be compatible.
Before choosing a clamp-style mount, you need to measure the thickness of your desk. Every clamp has a specified minimum and maximum thickness it can accommodate, for example, from half an inch to three inches. If your desk is thicker or thinner than this range, the clamp will not work. It is also wise to consider your desk’s material. A clamp puts a fair amount of pressure on a small area. For a solid wood or thick, high-quality composite desk, this is no problem. However, on a very thin or low-quality particleboard desk, it could potentially cause damage over time.
The second option is the grommet mount. This method provides an incredibly stable and clean-looking installation by using a single bolt that passes directly through a hole in your desk. Many office-style desks come with pre-drilled holes, often covered with a plastic cap, designed for cable management. These are perfect for a grommet mount. You simply remove the cap, pass the bolt through the hole, and secure it from underneath with a plate and nut. If your desk does not have a hole, you can drill one yourself if you are comfortable with the task and your desk material allows for it. The primary advantage of a grommet mount is its stability and the fact that you can place it further from the edge of the desk than a clamp allows, giving you more positioning options. It is a more permanent solution, but for those with a compatible desk, it offers a rock-solid foundation for any arm setup.
Ergonomics 101: Positioning for Comfort and Health
With your monitor arm securely mounted, the real transformation can begin. The primary goal, beyond freeing up space, is to create an ergonomic setup that supports good posture and prevents the chronic pain associated with long hours at a computer. A monitor arm gives you precise control over the three most important factors in screen ergonomics: height, distance, and angle.
Getting this right is not just about comfort; it is about your long-term health and productivity. Constant hunching and straining can lead to tension headaches, repetitive strain injuries, and chronic neck and back pain that can impact your life both in and out of work. By taking a few minutes to dial in the perfect position, you are making an investment in your own well-being. This is where a monitor arm truly shines, allowing for adjustments that are simply impossible with a standard stand.
4. Set Your Screen to Eye-Level Height
The single most important ergonomic adjustment you can make is setting your monitor to the correct height. When your screen is too low, you naturally crane your neck downwards to see it. Holding this position for hours on end puts significant strain on the vertebrae and muscles in your neck and upper back. This is the primary cause of "tech neck" and the associated aches and pains. The solution is to raise your screen so that you can view it with a neutral posture.
The rule of thumb is simple: when you are sitting up straight in your chair, your eyes should be level with the top edge of your monitor. Your natural gaze should fall on the upper third of the screen. This position allows you to keep your head balanced directly over your shoulders, which is the most relaxed and sustainable posture. To achieve this with your monitor arm, simply loosen the height adjustment mechanism—this might be a lever, a screw on the central pole, or it may not require loosening at all on a gas spring arm—and glide the screen up or down until it is in the perfect position.
Compare this to the old method of stacking books or reams of paper. Not only is that solution unstable and unsightly, but it also offers very little precision. With an arm, you can make micro-adjustments to find the exact height that feels right for your body and your chair. This simple act of raising your screen to eye level will provide immediate relief and, over time, help to retrain your body to maintain a healthier posture throughout the workday. It is the most impactful step you can take to stop neck strain before it starts.
5. Adjust for Optimal Viewing Distance
The second pillar of screen ergonomics is viewing distance. If your monitor is too close, your eyes have to work harder to focus, leading to eye strain, fatigue, and headaches. If it is too far away, you may find yourself leaning forward and squinting to read the text, which defeats the purpose of setting the correct height and reintroduces neck strain. The ideal viewing distance allows you to comfortably read the text on your screen while maintaining your upright, neutral posture.
A good starting point is the "arm's length" test. Sit in your normal working position and extend your arm straight out in front of you. Your fingertips should just about touch the surface of the screen. For most people, this is a comfortable distance, typically between 20 and 30 inches. However, this can vary based on your vision and the size of your screen. The key is to find the distance where you can see everything clearly without straining your eyes or your body.
This is another area where a monitor arm offers a massive advantage over a static stand. A stand dictates the screen’s distance based on its base size and where you can place it on your desk. An arm gives you complete freedom. You can easily pull the screen closer for tasks that require intense focus on small details, then push it back for general browsing or to create more space for non-digital work. Most arms also allow for easy tilt adjustment. Angling your screen slightly upwards (typically around 15-20 degrees) can help reduce glare from overhead lights and provide a more natural viewing angle, further reducing eye and neck strain. This ability to dynamically adjust both distance and tilt ensures your screen is always in the perfect position for the task at hand.
A Pro-Tip for Document-Heavy Work
Once you have mastered the ergonomic fundamentals of height and distance, you can explore more advanced configurations that are tailored to specific types of work. One of the most powerful and underutilized features of a good monitor arm is the ability to easily rotate the screen. For anyone who works extensively with long documents, this capability can be a genuine game-changer for productivity and workflow efficiency.
This simple rotation taps into the vertical nature of the content we often consume. Web pages, legal documents, articles, and lines of code all scroll vertically. By matching your screen's orientation to the content's orientation, you can see more at once and reduce the constant, distracting need to scroll. This is especially potent in a dual-monitor setup, but it can be just as useful for single-monitor users who frequently switch between different kinds of tasks.
6. Go Vertical for Reading and Coding
Most quality monitor arms are equipped with a VESA plate (the bracket that attaches the arm to the back of your screen) that can rotate a full 360 degrees. This allows you to turn your monitor 90 degrees from the standard landscape (horizontal) orientation into a portrait (vertical) orientation. The effect is immediate and dramatic. Suddenly, you can see an entire page of a word processing document or a PDF without scrolling. You can view long email threads in their entirety or see significantly more lines of code at a single glance.
This is incredibly beneficial for roles that involve a lot of reading, writing, or editing. Instead of constantly scrolling up and down to maintain your context, you can see the whole picture. For programmers, it means less time lost to navigating code and more time spent understanding it. For writers and editors, it makes it easier to get a sense of page flow and structure.
In a dual-monitor setup, the "one landscape, one portrait" configuration is a classic productivity powerhouse. You can use your primary landscape monitor for your main active task—writing an email, working in a spreadsheet, or designing an image. Your secondary, vertical monitor then acts as a perfect companion for reference material. You can have a research article, a style guide, a project brief, or a messaging application open and fully visible on the side. This eliminates the need to constantly switch between windows on a single screen, streamlining your workflow and helping you stay in a state of deep focus. The ability to effortlessly rotate your screen is a professional-level trick that a monitor arm makes accessible to everyone.
A Note on Safety in Your Remote Job Search
Now that your physical workspace is optimized for health and productivity, it is important to ensure your digital job-seeking environment is just as safe. As you look for the perfect remote role to enjoy in your newly upgraded office, be aware that fraudulent job postings are a real risk. Scammers often prey on enthusiastic job seekers. Knowing the red flags can protect you from financial loss and identity theft.
Keep these warning signs in mind as you review job opportunities:
- Vague Job Descriptions: Legitimate companies provide clear details about roles and responsibilities. Listings that are extremely vague or promise high pay for very little work are suspicious.
- Unprofessional Communication: Watch for emails or messages filled with grammatical errors, typos, or overly casual language. Professional recruiters maintain a high standard of communication.
- Interviews via Messaging Apps: While an initial screening might happen over text, a real company will conduct formal interviews via video call or phone. A "job offer" based solely on a text chat is a major red flag.
- Requests for Personal Financial Information: You should never be asked for your bank account number or other sensitive financial data before you have signed an official employment contract and completed legitimate onboarding paperwork.
- The "Buy Your Own Equipment" Scam: A common scam involves "hiring" you and then instructing you to purchase your own computer and supplies from their "preferred vendor," with a promise of reimbursement. They will send you a fake check to deposit, and by the time it bounces, you have already sent real money to the scammer's vendor site. Legitimate companies will either provide you with equipment directly or have a clear, secure reimbursement process that does not involve you paying their chosen supplier upfront.
- Offers That Seem Too Good to Be True: If you receive a job offer for a high-paying position very quickly and with little to no interview process, be extremely cautious. Real hiring takes time.
Trust your instincts. If a job opportunity feels strange or rushed, take a step back and investigate the company further before providing any personal information.
What to Do Today
You can move from a cluttered, uncomfortable desk to a spacious, ergonomic workstation by taking a few simple, concrete steps. Here is your plan for today.
First, go to your desk and assess your current situation. Take a tape measure and check the thickness of your desktop at the back edge. Note the material—is it solid wood, MDF, or particleboard? Look for a lip or overhang for a clamp mount, and check to see if there is a pre-drilled cable management hole that could be used for a grommet mount.
Second, check your monitor or monitors. Look at the back for a square pattern of four screw holes. This is the VESA mount interface, which is standard on most modern screens. You will also need to know the weight of your screen, which you can usually find by searching for the model number online. Make sure the monitor arm you consider can support that weight.
Third, based on your assessment, decide on the right configuration. Do you need a single or dual arm? Will a clamp or a grommet mount work better for your desk? Knowing the answers to these questions will narrow down your options significantly.
Finally, armed with this information, you can confidently find a monitor arm that fits your screens, your desk, and your workflow. Taking these small actions today is the first step toward reclaiming your desk space and putting an end to neck strain for good.
Pay figures are typical ranges, not guarantees. See today's live jobs.