
Jobs to Inbox is a participant in the Amazon Services LLC Associates Program. When you buy through links on this page we may earn a commission, at no extra cost to you. We choose every product ourselves and we are never paid to include one. How we pick.
Work From Home Essentials and Desk Gear
Closet Office Ideas: Turn a Closet Into a Workspace in One Weekend (9 Steps)
Use these nine simple closet office ideas to transform an underused space into a productive remote work nook in a single weekend.
The quick answer
- Measure your closet, then clear it out and apply a fresh coat of light-colored paint.
- Install a desk surface, shelving, and layered lighting for a functional workspace.
- Select a chair that fits, manage all cords, and add ventilation for comfort.
Finding a quiet, dedicated place to work from home can feel like an impossible task. Your kitchen table is command central for the whole family, the sofa is a recipe for distraction, and a proper home office is a luxury many of us simply do not have. This is where looking at your home with fresh eyes and a few good closet office ideas can completely change your remote work life. In just one weekend, you can convert a cluttered, forgotten closet into a focused, functional, and private workspace.
This guide provides nine concrete steps to make that happen. A dedicated workspace, even a small one, sends a powerful signal to your brain that it is time to focus. When you can literally close the door on your work at the end of the day, it helps create the separation needed for a healthy work-life balance. We will walk you through the process from initial measurement to the final touches that make the space truly yours.
Our tested picks for an 8-hour day
Smallest real footprint
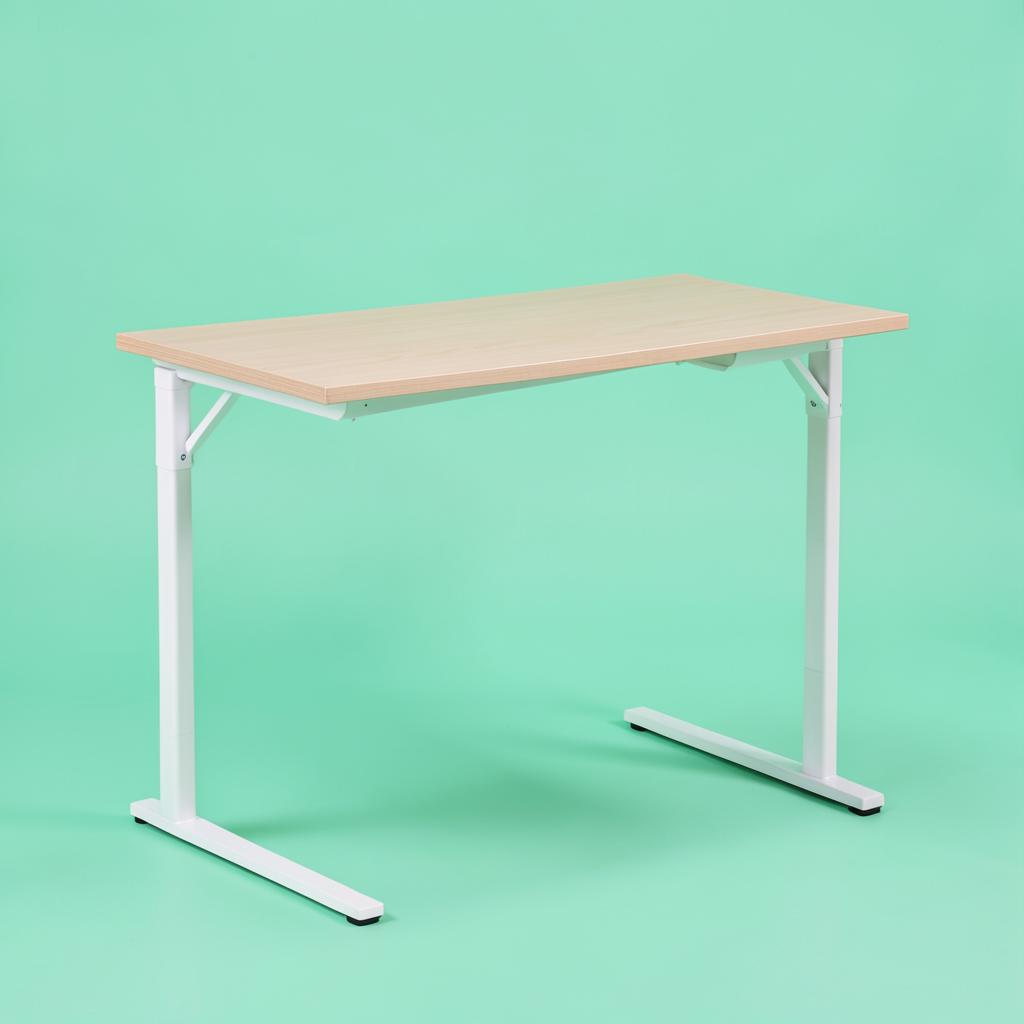
Prepac Floating Desk
Hallways and rooms where nothing can touch the floor.
Mounted into studs, this gives you a working surface with no legs to walk into and a clear floor underneath, which visually gives a small room back to you. There is a drop-down section that hides pens, cables and a notebook, so the wall looks tidy when you stop for the day. The trade-offs are real: you are drilling into a wall, the height is fixed at whatever you mount it at, and the weight limit suits a laptop, a light monitor and a lamp rather than two big screens.
Best budget pick
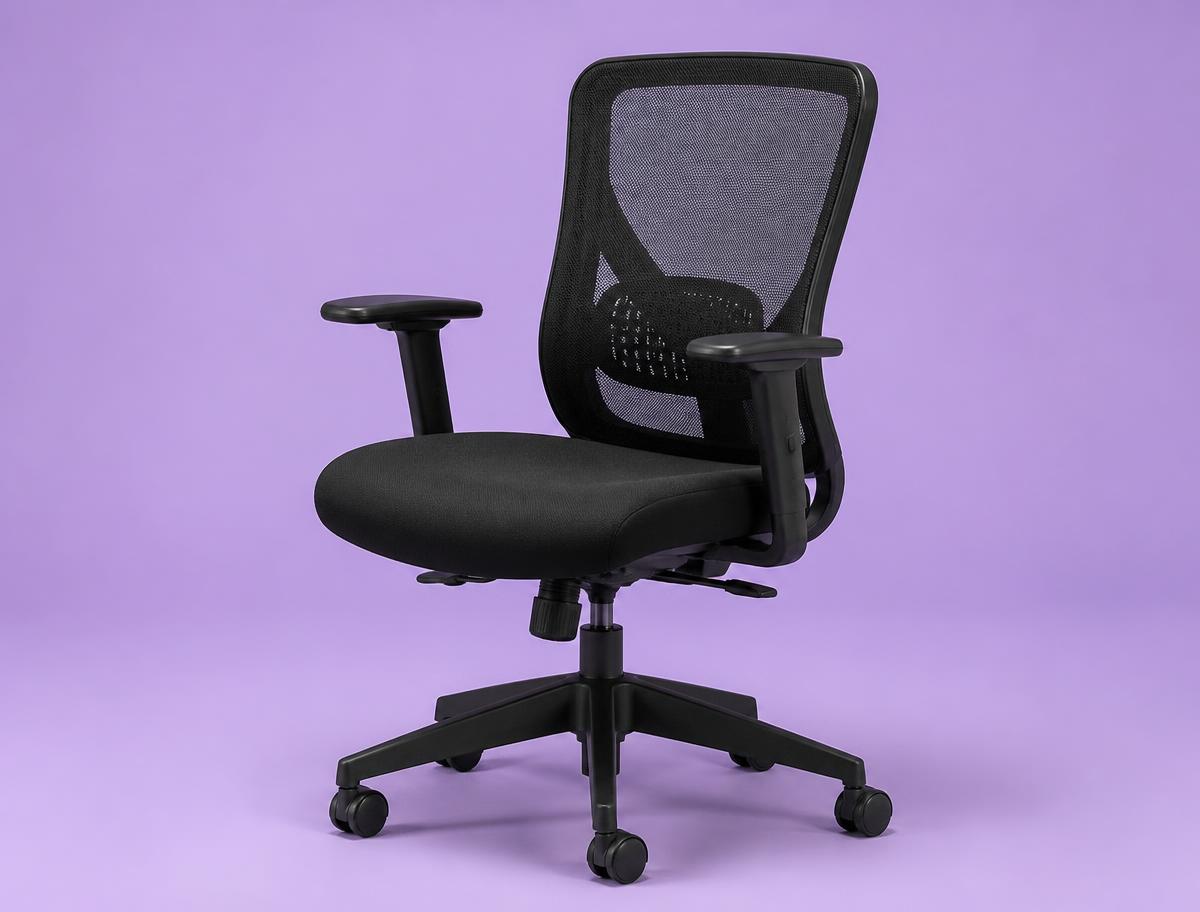
SIHOO M57 Ergonomic Chair
The first real chair after a dining chair or a gaming chair.
This is where the meaningful floor is. The lumbar pad moves up and down and in and out, the armrests adjust in three directions, and the mesh back does not turn into a hotplate by the afternoon. It is rated to 330 pounds, the recline locks in a few positions rather than infinitely, and the seat foam is firmer than most people expect on day one. It breaks in inside two weeks and it holds up.

Step one: get the lens to eye level
Amazon Basics Adjustable Laptop Stand
Anyone still taking calls on a laptop sitting flat on a desk.
The cheapest part of the build and the one that changes the most. Lifting the laptop until the camera sits level with your eyes removes the up-the-nose angle instantly, straightens your neck, and makes you look like someone who has done this before. A stack of books does the same job for free, but a stand holds the angle steadily, folds flat when the room has to become a bedroom again, and does not slide when you type. Pair it with any cheap external keyboard so your hands still have somewhere sensible to go.
Phase 1: Planning Your New Workspace
Proper planning is the foundation of a successful weekend project. Rushing into a closet conversion without thinking through the details can lead to frustration, wasted time, and a space that does not truly meet your needs. These first two steps ensure you start with a clear vision and a clean slate, setting you up for a smooth and satisfying transformation. This is where your abstract ideas begin to take physical shape.
1. Measure Everything Twice
Before you buy a single thing or even move a box, your most important tools are a measuring tape and a notepad. An accurate understanding of your space is the only way to ensure your new desk fits, your chair can slide in, and your shelves are the right size. Start by measuring the three most critical dimensions of the closet's interior: width, depth, and height.
For width, measure at three different points: near the bottom, in the middle, and near the top. Walls are rarely perfectly straight, and a closet that is 36 inches wide at the floor might only be 35.5 inches wide three feet up. Record the narrowest measurement, as this is your true functional width. Do the same for the depth, measuring from the back wall to the inside of the door frame. Finally, measure the floor-to-ceiling height.
Next, consider the closet door and its frame. Measure the width of the doorway opening. This is crucial if you plan to use a small, pre-assembled desk, as the desk must be able to fit through the door. Also, pay attention to the type of door. Bifold doors may need to be removed and replaced with a curtain to maximize interior space, while a standard swinging door might block a nearby walkway when left open. Sketch out the closet on your notepad, writing down all your measurements clearly. This simple drawing will become your blueprint for the entire project.
2. Clear, Patch, and Paint
With your measurements in hand, it is time to create your blank canvas. Begin by completely emptying the closet of all its contents. This is often the most physically demanding part of the process, but it is also an excellent opportunity to declutter. Sort items into three piles: keep, donate, and discard. Be realistic about what you need to store elsewhere in your home.
Once the closet is empty, remove any existing hardware you will not be using, such as closet rods or old shelving brackets. This will likely leave holes and scuffs on the walls. Use a small container of spackling compound and a putty knife to fill these imperfections. Apply a small amount, smooth it over the hole, and let it dry completely according to the manufacturer's instructions. Once dry, lightly sand the patched areas until they are smooth and flush with the wall.
Now for the transformative step: paint. A fresh coat of paint does more than just cover up old marks. It makes the space feel new, clean, and intentional. For a small, enclosed area like a closet, light colors are your best friend. Whites, light grays, pale blues, or soft beiges will reflect light and make the space feel larger and more open. A dark color can make the closet feel even smaller and more confining. Use a high-quality painter's tape to protect the door frame and any trim. Apply a coat of primer first, especially if you are making a drastic color change or painting over glossy paint. After the primer is dry, apply two coats of your chosen color, allowing for adequate drying time between coats.
Renter-Friendly Note: If you are not allowed to paint, do not despair. You can achieve a similar effect using high-quality, removable peel-and-stick wallpaper. It comes in a vast array of colors and patterns and can be removed without damaging the walls when you move out.
Phase 2: Essential Infrastructure
With a clean, freshly painted space, you can now install the core components of your office. This phase is about building the functional backbone of your new work area: a reliable power source for your technology and a sturdy surface on which to work. Getting these two elements right is critical for both productivity and safety.
3. Check and Plan for Power
Your laptop, monitor, and lighting all need electricity. Before you go any further, assess your power situation. The ideal scenario is having an electrical outlet already inside the closet. If you do, your job is much easier. If you do not, look for the nearest outlet on the wall just outside the closet.
Your goal is to get power into the closet safely. Running a single, heavy-duty extension cord from a nearby outlet to a power strip inside the closet is a common solution. Make sure both the extension cord and the power strip are high-quality, rated for the devices you plan to use, and have surge protection. To keep the cord neat and prevent a tripping hazard, you can run it along the baseboard and secure it with removable cord clips, tucking it under the door if possible. For a cleaner look, some people cut a small, discreet hole in the drywall at the back of the closet to feed the cord through from an adjacent room's outlet, but this is a more advanced step.
Never overload an outlet or a power strip. Add up the power requirements of your computer, monitor, and any other devices. If you are unsure about electrical work or need a more permanent solution, it is always best to consult with and hire a licensed electrician to safely install a new outlet inside the closet. For lighting, you can also reduce your reliance on outlets by choosing high-quality, rechargeable battery-powered options.
4. Add a Desk Surface
The desk is the centerpiece of your closet office. The type you choose will depend on your closet's dimensions, your budget, and your DIY comfort level. The key is to maximize your work area while leaving enough room for your legs and chair.
One of the most popular and space-efficient options is a built-in floating desk. This involves mounting a sturdy piece of wood, laminate countertop, or butcher block directly to the wall studs. You would secure a support cleat (a piece of 1x2 or 2x4 lumber) to the studs on the back and side walls at your desired desk height, typically 29-30 inches from the floor. The desktop then rests on these cleats and is secured from above or below. This method provides a very sturdy, custom-fit surface with maximum legroom underneath.
If you are less inclined to build something in, you have other great choices. Look for a small, narrow writing desk or console table that is just shallow enough to fit inside your closet's depth. Be sure to check your measurements from Step 1. The advantage here is that there is no installation required, making it very renter-friendly.
Another excellent option for very small closets is a wall-mounted, fold-down desk. These units are mounted to the back wall of the closet and provide a work surface that can be folded up and out of the way when not in use. This can be ideal if the closet still needs to serve a dual purpose.
Renter-Friendly Note: Besides a freestanding desk that requires no installation, you could also consider a tension-based shelving system that includes a desk component. These systems use pressure between the floor and ceiling to hold standards in place, and you can attach brackets and a desktop surface without making a single hole in the wall.
Practical Closet Office Ideas for Illumination and Storage
A desk in a dark, empty box is not a functional office. This is where thoughtful additions turn your closet from a mere nook into a truly productive environment. Good lighting prevents eye strain and boosts mood, while smart storage keeps your limited desk space clear and your mind focused. These next steps are some of the most impactful closet office ideas for daily use.
5. Layer Your Lighting
A single, bare bulb overhead, typical in most closets, is simply not adequate for a workspace. It creates harsh shadows and contributes to eye fatigue. The solution is layered lighting, which combines different types of light to create a bright, comfortable, and evenly lit area.
Start with your primary task lighting. This is the light that illuminates your immediate work surface. An excellent, low-profile choice is an under-cabinet LED light strip. These are thin, self-adhesive strips that you can stick to the underside of the first shelf above your desk. They provide bright, direct light onto your keyboard and papers without taking up any desk space.
Next, consider ambient light. If the overhead fixture is still in place, swap the bare bulb for a fixture that diffuses the light more softly. If you removed the fixture, or if you are a renter, you can use battery-powered, motion-activated or remote-controlled LED "puck lights." Stick a few of these to the ceiling or high on the walls to provide general illumination when you open the door.
Finally, you might add a small, slim-profile desk lamp for adjustable, focused light. Look for one with a small base or a clip-on design to conserve space. When choosing bulbs or LED fixtures, opt for a "daylight" or "cool white" color temperature, as this type of light most closely mimics natural sunlight and is known to improve focus and reduce sleepiness during work hours.
6. Install Vertical Shelving
In a small space, the only way to go is up. Your desk surface should be reserved for your immediate-use items: your computer, a notepad, and your mouse. Everything else, including paper, pens, reference books, and supplies, should have a home on shelves above your desk. This keeps your primary workspace uncluttered, which in turn helps keep your mind uncluttered.
Floating shelves are a perfect match for a closet office. They have a minimalist look and do not have bulky side brackets, which helps the space feel more open. Install two or three shelves running the full width of the closet, starting about 18-24 inches above your desktop. This leaves plenty of room for your monitor while giving you ample storage. Make sure to mount the shelves securely into wall studs or use heavy-duty drywall anchors rated to hold a significant amount of weight.
If you are not comfortable mounting shelves, a narrow, tall, freestanding bookshelf can be placed on one side of the closet, perpendicular to your desk. You lose some desk width, but you gain easy-to-access storage without any drilling. This is another fantastic renter-friendly alternative. Use decorative boxes or magazine files on your shelves to corral smaller items and maintain a neat and tidy appearance. When everything has a designated place, it is much easier to keep your small office organized.
Furnishing for Comfort and Focus
You can have the best lighting and the perfect desk, but if you are uncomfortable, you will not be able to work effectively for long periods. This section focuses on the most critical piece of ergonomic equipment: your chair. Finding the right one for a compact space presents a unique challenge that requires careful consideration of size, function, and comfort.
7. Find a Chair That Fits
Choosing a chair for a closet office is a balancing act. It must be comfortable and supportive enough for hours of work, but also compact enough to fit within the confined space. A standard, large executive office chair with wide armrests will almost certainly not work. It will be too bulky to maneuver and may not even allow you to sit at the desk properly.
Your primary measurement to consider is the chair's width, especially if it has armrests. Measure the space between your desk and the closet wall or door frame to see what will fit. Often, the best solution is an armless task chair. Removing armrests from the equation dramatically increases the number of chairs that will fit in a tight space and allows you to slide the chair completely under the desk. This is key if you want to be able to close the closet door at the end of the day.
Look for a chair with essential ergonomic adjustments, such as seat height adjustment and a supportive backrest. A simple task stool or a drafting chair can also work well, as they are designed with a smaller footprint. Before you commit, think about your workflow. Do you need to swivel and roll, or will you be mostly stationary? A chair with wheels offers more flexibility, but a stationary chair can provide more stability in a tight squeeze. If possible, try sitting in a few different styles to see what feels best for your body and your small space. The goal is a chair that supports good posture without overwhelming the closet.
Final Touches for a Professional Workspace
The main construction is complete, but the final details are what elevate your closet from a simple desk-in-a-box to a polished, professional office. These last steps tackle the practical realities of daily use, addressing cord clutter and air circulation, making your new office not just functional, but genuinely pleasant to be in.
8. Master Your Cord Control
A tangle of wires is the enemy of a clean, organized workspace. In a small area like a closet office, messy cords are not just an eyesore; they can easily get snagged, unplugged, or become a tripping hazard. Taming this digital spaghetti is a quick but high-impact task.
Start by gathering all your cords and plugging them into your surge protector, which should be placed in an out-of-the-way spot, such as on the floor in a back corner or even mounted to the underside of your desk. From there, you can use several simple tools to bundle and hide the wires. A fabric cable sleeve can wrap all the cords running from your desk to the power strip into one neat tube.
For individual cords on your desk, use small, adhesive cable clips. You can stick these to the back edge of your desk or along the leg to guide your phone charger or laptop power cord exactly where you want it to go. For the main extension cord running into the closet, a cord raceway can be a great solution. This is a plastic channel that sticks to the baseboard and hides the cord inside, creating a very clean, built-in look. Taking just 20 minutes to manage your cables will make your tiny office feel significantly more spacious and professional.
9. Add Ventilation and Comfort
Closets are not designed for human occupation, so they typically have zero ventilation. After an hour of working with the door closed, the space can become warm and stuffy. Addressing this is important for your comfort and ability to concentrate.
The simplest solution is to work with the closet door open whenever possible. If you need to close the door for privacy or to block out noise, make sure you have a way to circulate the air. A small, quiet, USB-powered fan is a perfect accessory. These fans are tiny, take up almost no desk space, and can be plugged directly into your computer or a USB hub. Position it to create a gentle cross-breeze.
Finally, make the space your own. Just because it is a closet does not mean it has to feel like one. Add a small corkboard or a magnetic board to the wall space on the side to pin up notes, photos, or inspiring quotes. Use a nice mousepad and a mug for your pens. If you have a shelf that gets a little light, a small, low-light-tolerant plant like a snake plant or a ZZ plant can bring a touch of life into the space. These small, personal touches will make you feel happier and more creative in your new, custom-built office.
A Note on Professionalism and Remote Work Safety
Now that you have created a professional workspace, you are better positioned to pursue the many legitimate remote job opportunities available. As you search for these roles, it is crucial to protect yourself from the unfortunate rise of fraudulent job postings. Scammers often prey on eager job seekers, and knowing the red flags is your best defense.
Be wary of job descriptions that are extremely vague about the actual duties but promise a very high salary for little experience. A real employer wants you to understand the role you are applying for. Another major red flag is a "recruiter" who contacts you out of the blue and insists on conducting the entire interview process over a text-messaging app or email. Legitimate companies will almost always conduct interviews via video call or phone call to have a real conversation with a candidate.
Most importantly, never provide sensitive personal information like your bank account number, social security number, or a photo of your driver's license early in the process. A real employer will only ask for this information after you have a firm, verifiable job offer and are completing official new-hire paperwork. Be especially cautious of any "job" that requires you to pay for your own equipment or training, or one that sends you a check to deposit and asks you to use the funds to buy supplies from their "preferred vendor." This is a common scam. A legitimate remote employer will either provide you with equipment or reimburse you for it through a standard expense process. Trust your instincts; if an offer feels too good to be true, it probably is.
What to Do Today
You have the roadmap to turn a cluttered closet into a productive office. Waiting for the "perfect time" means it will never get done. Take the first small steps this evening to build momentum for your weekend project.
First, choose the closet you want to convert. Open it up and take a quick look. Do not get overwhelmed by the clutter; just visualize the potential. Take a "before" photo on your phone so you can appreciate the transformation later.
Second, find a measuring tape and a notepad. Complete Step 1: Measure everything. Get the width, depth, and height, and sketch out a simple plan. This single action will make the entire project feel real and achievable.
Third, based on your measurements, decide on one type of desk surface from Step 4 that you think will work best for you. Whether it is a freestanding desk, a built-in top, or a fold-down version, having a specific goal in mind will make the next steps much clearer. Taking these small actions today moves your closet office from an idea to a plan.
Pay figures are typical ranges, not guarantees. See today's live jobs.