
Jobs to Inbox is a participant in the Amazon Services LLC Associates Program. When you buy through links on this page we may earn a commission, at no extra cost to you. We choose every product ourselves and we are never paid to include one. How we pick.
Work From Home Essentials and Desk Gear
Cable Management for a Home Office: 8 Cheap Fixes for the Mess Under Your Desk
Good cable management is the secret to a focused remote work environment, and you can achieve it with these eight cheap and simple fixes.

The quick answer
- Use trays, sleeves, and reusable ties to bundle, guide, and hide wires.
- Mount your power strip under the desk to get all your plugs off the floor.
- Reduce the total number of cables with a docking station or wireless peripherals.
That tangled nest of wires under your desk is more than just an eyesore. It’s a constant, low-grade source of stress that makes your home office feel chaotic and temporary. Achieving effective cable management feels like a complex, expensive project, but it is one of the best things you can do for your focus. We are going to show you eight inexpensive ways to fix the mess and create a workspace that feels calm, organized, and professional.
Creating a tidy workspace is about more than just appearances. When your physical environment is in order, your mind has an easier time staying on task. You avoid the frustration of kicking a loose plug, the minutes wasted tracing a cord back to its source, or the unprofessional look of a wire jungle in the background of a video call. These simple fixes will help you reclaim your space and build a more productive remote work routine.
Our tested picks for an 8-hour day
The one I use — best overall
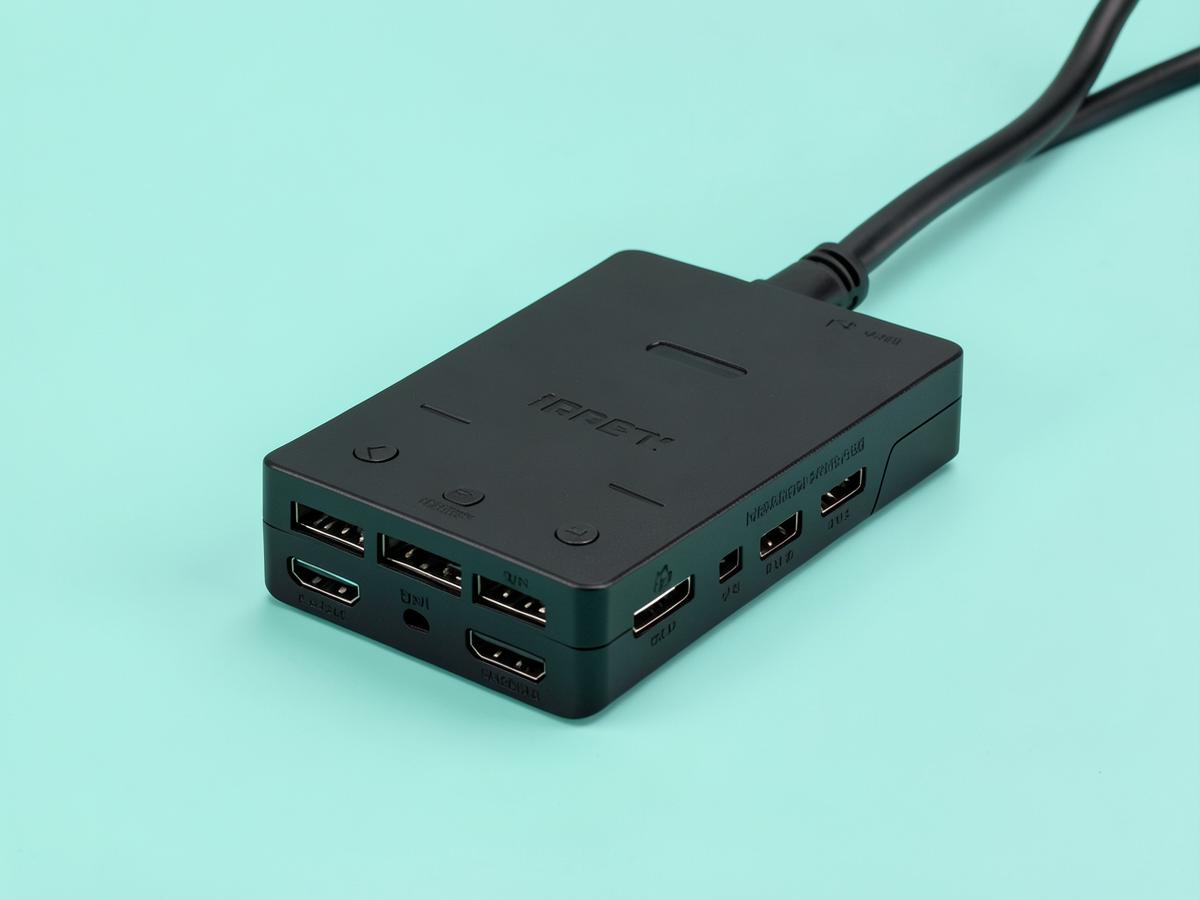
Anker Laptop Docking Station Dual Monitor 8-in-1
Two external screens, one cable, and a morning routine you stop noticing.
Months in, the thing I notice about this dock is that I do not notice it. One USB-C cable goes into the laptop and two monitors, a keyboard, a mouse, a headset and the charger all come alive at once. It handles two screens over the twin HDMI outputs, passes power through to the laptop so there is no separate charger to fumble for, and includes ethernet — which matters more than people expect, because a wired connection during a long call is noticeably steadier than a flat's wireless. It runs warm after a full day, which is normal for the class, and the fixed cable is short enough that the dock has to sit near the laptop rather than tucked away behind the desk. Neither is a real complaint. What matters is that it has never dropped a screen mid-call, which is the failure mode that makes cheap docks worthless. If you work from a laptop with two monitors in front of you, this is the purchase that removes a small irritation from every single working day, and it costs less than a decent office chair cushion arrangement.

Bench winner — 9.4/10
Logitech K950 Wireless Keyboard
Shared rooms, thin walls and back-to-back calls.
The quietest board on the bench and the only one the listener in the next room could not hear at all. Low-profile scissor switches with a short, soft landing, and — crucially — a space bar that does not knock. Most keyboards fail on that one key, and this one does not. Typing feel is light and fast, closer to a good laptop than a desktop board, and the full-size layout keeps a number pad for anyone entering figures all day. Battery life runs into months on the supplied cells.

Best overall
Logitech Lift Vertical Ergonomic Mouse
Most people, and especially anyone with small to medium hands.
A 57-degree vertical angle in a body small enough that it does not swamp an average hand, which is the flaw in most vertical mice. The clicks are quiet enough to go unnoticed on a live call, which matters more than it sounds when your headset sits four inches from the mouse. It pairs to three machines and switches between them with a button underneath — useful when a work laptop and a personal one share the same desk.
Smart cable management for a tidy space
The single biggest improvement you can make is to get everything up off the ground. The floor under your desk should be clear. This not only looks infinitely better but it also prevents dust bunnies from clinging to your power adapters, makes cleaning easier, and removes the risk of accidentally unplugging your computer with your foot in the middle of an important task. The first step is to create a new home for all those heavy power bricks and loops of excess cable.
1. Under-Desk Cable Tray
An under-desk cable tray is the unsung hero of a tidy workspace. Think of it as a long, narrow basket or shelf that you mount to the underside of your desk, usually toward the back. These are typically made of metal mesh or a solid material and are designed specifically to hold power strips, bulky power adapters, and all the extra lengths of your cables. They create a hidden, elevated channel where all the electrical clutter can live, completely out of sight and off the floor.
Installation is usually straightforward. Most trays are designed to be screwed directly into the bottom of a wooden or particleboard desk. This provides the most secure and permanent hold. Before you begin, you should flip your desk upside down if possible, or at least make sure you have plenty of room to work underneath it. Measure the area to ensure the tray you choose will fit between your desk legs and won't interfere with any drawers. Position the tray, mark the spots for the screws, drill small pilot holes to prevent the wood from splitting, and then securely fasten the tray in place. Some lighter-duty versions may come with strong adhesive tape, which can be a good option if you are unable or unwilling to drill into your desk surface. Just be sure to thoroughly clean the surface with rubbing alcohol first to ensure a strong bond.
Once the tray is installed, the real organization begins. Start by gathering all your power adapters and the power strip you plan to use. Place the power strip inside the tray first, positioning it so you have easy access to the outlets. Then, plug in each of your power adapters. Instead of letting the excess cable from each device hang down, carefully coil it and place the coil inside the tray next to its adapter. This simple act of coiling and containing the slack is what transforms the chaos into order. A simple version of this type of tray typically costs between $15 and $30, making it a high-impact, low-cost starting point for your cable management project.
Grouping and Guiding Loose Cables
With the power bricks and adapters off the floor, the next step is to address the individual cables running from your devices to their power source or to each other. Letting them hang freely creates a stringy, disorganized look. The goal here is to group cables that are heading in the same direction and guide them along discreet paths, like the back edge or leg of your desk. This makes them appear as a single, intentional line rather than a random web of wires.
2. Reusable Cable Ties
When you hear "cable ties," you might picture the single-use plastic zip ties that a technician would use. For home office use, reusable ties are a much better option. These are typically soft fabric strips with a hook-and-loop fastening system, similar to what you find on a jacket or shoes. They come in various lengths and can be wrapped around a bundle of cables and secured onto themselves. The major advantage is that they are adjustable, removable, and reusable. If you add a new monitor or get a different printer, you can simply undo the tie, add the new cable to the bundle, and re-fasten it.
The best way to use them is to identify cables that share a common path. For example, the power cord, video cable, and USB cable for your monitor all run from the back of the screen down toward your power strip or computer. Use a reusable tie to bundle them together near the monitor. Use another tie halfway down the path, and a third near the end of the run. This transforms three or four dangling cables into one thicker, neater bundle. You can do the same for the cables coming from your laptop, your speakers, and any other peripherals. These ties are very gentle on your cables and will not pinch or damage them the way tightly cinched plastic ties can. A multi-pack of reusable ties is typically very affordable, often costing between $5 and $15.
3. Adhesive Cable Clips
For guiding single cables along a specific path, adhesive cable clips are an ideal solution. These are small plastic holders with an adhesive backing. They come in various sizes to accommodate different cable thicknesses, from a thin phone charging cable to a thicker power cord. You can stick them to almost any flat surface: the underside of your desk, along the back edge, or vertically down a desk leg. They discreetly hold a cable in place, preventing it from drooping or dangling where it should not.
Think about the journey of a single wire. Perhaps you have a charging cable for your phone that you want to keep handy on your desktop. You can run it from the power source under your desk, up a desk leg using a few clips to hold it taut, and then along the back edge of your desk with a few more clips. The final clip can hold the end of the connector right at the edge of your desk, ready for you to grab when you need it. This prevents the cable from falling behind your desk every time you unplug your phone. They are also perfect for routing the cable for your desk lamp or the power cord for your monitor. Before applying them, clean the surface with a bit of alcohol to remove any dust or oils, ensuring the adhesive gets a firm grip. A pack containing a variety of clip sizes typically costs less than $10.
Hiding Wires in Plain Sight
Even after bundling your cables, you might still have a visible run of wires that you would prefer to conceal. This is often the case for the main bundle of cables running from your desk to the wall outlet or from your computer to your monitor. The goal here is not just to bundle, but to completely hide the bundle within a more attractive casing, making it blend into the background.
4. Cable Sleeve
A cable sleeve, sometimes called a cable wrap or conduit, is a flexible tube made of fabric or plastic that you use to encase a group of wires. It effectively combines a messy handful of different colored cables into a single, uniform tube. This is one of the most effective ways to clean up the visible run of cables between your desk and the wall or from the floor up to a standing desk. The result is a much cleaner and more professional aesthetic.
These sleeves come in a few common designs. One popular type is made of a flexible neoprene fabric and has a zipper running down its length. To use it, you simply gather your cables, lay them on the open sleeve, and zip it up around them. This is incredibly easy to use and makes adding or removing cables in the future a simple process of unzipping. Another common design is a split plastic tube that you can pry open and press your cables into. The plastic then naturally closes around the bundle. These are available in different colors, like black, white, or gray, so you can choose one that best matches your desk or wall color to make it even less conspicuous. Before buying one, measure the length of the cable run you want to cover and estimate the diameter of your cable bundle to ensure you get a sleeve that is the right size. A standard-length cable sleeve is a great value, typically costing between $10 and $20.
5. Mounted Power Strip
This is a simple but transformative step that works in tandem with an under-desk tray. Instead of just placing your power strip in a tray or letting it sit on the floor, you can mount it directly to the underside of your desk or to the back of it. This secures it in place, makes the outlets easier to access, and guarantees it never gets moved or kicked. The best part is that it concentrates all of your plugs in one hidden location, with only a single cord running from the power strip to your wall outlet.
To do this, you will need a power strip that has mounting keyholes on the back. These are two holes, one narrow and one wide, that allow you to hang the strip on screws. First, figure out the best location under your desk. The back edge is usually ideal. Place a piece of paper over the back of the power strip and use a pencil to poke through the mounting holes, creating a perfect template. Tape this template to the underside of your desk where you want to mount the strip. Drill two small screws into the spots marked by your template, but do not drill them all the way in. Leave the screw heads sticking out just enough to slide the wide part of the keyhole over them, then push the power strip so the screws slide into the narrow part, locking it in place. Now you can plug everything in, knowing the strip is secure. The cost is just the price of a basic power strip with mounting holes, typically in the $15 to $30 range.
Maintaining a Safe and Professional Workspace
A clean desk is a safe desk, free from the trip hazards of loose wires. This same principle of safety and professionalism should extend to your online work environment, especially when searching for remote jobs. Just as you are cleaning up physical clutter, it is wise to be vigilant about digital clutter and potential scams. An organized approach to your job search includes knowing how to spot and avoid fraudulent offers.
As you build a professional remote work setup, remember that legitimate companies conduct their hiring professionally. Be cautious of offers that seem too good to be true or hiring processes that feel unprofessional. For example, a real employer will never ask you to pay for equipment, training materials, or background checks. They will not ask for your bank account information or a copy of your driver's license before you have signed a formal offer letter.
Interviews for remote roles are typically conducted over video calls, not exclusively through text-based chat applications. An offer made without any form of verbal or video interview is a significant red flag. Scammers often create a sense of urgency, pushing you to accept an offer and provide personal information immediately. A legitimate company will give you reasonable time to consider an offer. By maintaining a healthy skepticism and looking for these warning signs, you protect your personal information and ensure that your professional remote work journey begins with a real, secure opportunity.
Organizing and Reducing Your Cable Count
The most advanced form of cable management involves not just hiding cables, but actively reducing the number of them in the first place. Every cable you can eliminate is one less thing to plug in, unplug, route, and manage. This creates the cleanest and most minimalist desk setup possible, freeing up both physical space and mental energy.
6. Labeling
This is the cheapest and arguably one of the most helpful fixes on the entire list. Before you bundle and hide all your cables, take five minutes to label both ends of each cord. You can use a dedicated label maker to print small, neat tags, or you can simply use a small piece of masking tape and a permanent marker. On each end of the cable, write what it belongs to, for example, "Monitor 1 Power," "Laptop Charger," or "Webcam USB."
This seems like a trivial step until the day you need to troubleshoot a problem or move your desk. Imagine trying to figure out which of the eight identical black plugs in your power strip belongs to the speaker that just stopped working. Without labels, your only option is to start unplugging things one by one, risking shutting down your computer or external hard drive at the wrong moment. With labels, you can identify the correct plug in seconds. It is a small investment of time upfront that will save you immense frustration down the road. It transforms your organized setup from something that just looks good into something that is also functional and easy to maintain. The cost is practically nothing if you use tape and a pen you already own.
7. Docking Station
A docking station is a powerful tool for drastically reducing cable clutter, especially for laptop users. A dock is a central hub that contains a variety of ports: USB, video outputs for monitors, an Ethernet jack, and more. You plug all of your desktop peripherals—your external monitor, keyboard, mouse, webcam, and even your power adapter—into the docking station. The dock then connects to your laptop with a single cable, typically a USB-C or Thunderbolt cable.
The impact is immediate and profound. Instead of plugging in four or five separate cables every time you sit down at your desk, you only have to plug in one. Your laptop starts charging, and it instantly connects to all of your peripherals. This makes transitioning between mobile use and your desktop setup incredibly seamless. It eliminates the "tentacles" that are usually attached to the sides of a laptop on a desk. While a docking station is the most expensive item on this list, it provides an enormous boost in convenience and organization. The cost for a quality dock that can handle video and power delivery typically starts around $50 and can go up significantly depending on the number and type of ports it offers. For those who frequently connect and disconnect a laptop, the investment is often well worth it for the improved workflow and clean look.
8. Wireless Keyboard and Mouse
The final frontier of cable reduction on your desktop is to eliminate the wires for your most-used peripherals: the keyboard and mouse. Moving to wireless versions instantly removes two of the most visible and constantly moving cables from your desk surface. This not only creates a much cleaner look but also gives you more freedom to position your keyboard and mouse exactly where they are most comfortable, without being tethered to your computer.
Most wireless keyboards and mice connect in one of two ways. Some use a small USB dongle that you plug into your computer or docking station. The peripherals then communicate wirelessly with that dongle. Others use Bluetooth to connect directly to your laptop or desktop without needing a dongle at all, which is great if you are short on USB ports. The primary consideration with wireless peripherals is battery life. Most modern versions can last for months or even over a year on a single set of batteries or a single charge. Some are rechargeable via a USB cable, which you only need to plug in occasionally. The freedom from these two cables makes a surprising difference in how tidy your primary workspace feels. A reliable wireless keyboard and mouse combination can be found for a typical price of $30 to $60.
What to Do Today
You do not need to tackle this entire project at once. Lasting organization comes from small, consistent steps. Here is how you can start transforming your workspace today.
First, take a moment to really look at the current state of your desk. Get on the floor and see what is happening underneath. Take a photo with your phone. Understanding the specific nature of your cable mess is the first step to fixing it.
Next, choose one single thing to untangle. Do not try to fix everything. Just find the most obvious knot of two or three cables and separate them. This small victory will build momentum.
Then, review the eight fixes above and pick just one or two that would make the biggest impact on your specific setup. If your floor is the main problem, start with an under-desk tray. If you have many devices, start with labeling.
Finally, take a simple measurement. If you decided a cable sleeve is the right choice, measure the length of the cables you want to cover. If you chose a tray, measure the available space under your desk. Write these numbers down. Now you have a concrete, actionable plan to begin your journey to better cable management and a more focused, professional home office.
Pay figures are typical ranges, not guarantees. See today's live jobs.